I. Introduction
Clean drinking water is vital for maintaining good health, and having access to purified water at home ensures the well-being of your family. Installing an under sink water filtration system is an effective way to elevate the quality of your drinking water. By eliminating impurities and contaminants commonly found in tap water, such a system enhances the taste and contributes to better overall health. The water filter installation process involves fitting the filtration unit to ensure clean and purified drinking water.
Benefits of installing an under sink water filtration system:
- Removal of Contaminants: These systems are designed to eliminate various contaminants such as chlorine, sediment, lead, and other harmful substances present in tap water.
- Improved Taste and Odor: Filtering out impurities results in water that tastes and smells cleaner and fresher, making it more appealing for drinking and cooking.
- Convenience: A filtration system installed directly under the sink provides easy access to clean water for drinking and cooking purposes without requiring separate filters or pitchers.
-
Cost-effective: In the long run, investing in an under-sink water filtration system can be more economical than constantly buying bottled water or replacing filter pitchers.

II. Tools and Materials Needed
Water filtration installation requires precision in setting up systems that remove impurities from water, improving its quality. Before beginning the installation process, gather the following tools and materials:
Tools:
- Adjustable wrench
- Pipe cutter or tubing cutter
- Pliers
- Screwdriver
- Safety goggles
Materials:
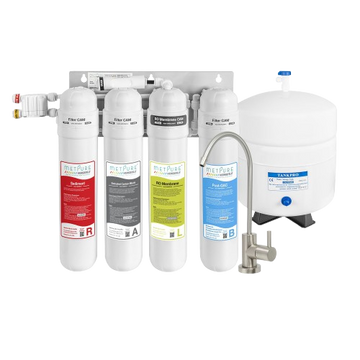
- Under sink water filtration system kit
- Teflon tape or plumber's tape
- Bucket or towels
III. Preparation
- Shut Off the Water Supply
Before initiating the installation process, it's crucial to turn off the water supply to the sink area A water filtration system purifies and cleanses water, ensuring it's safe for consumption and use in various applications. This helps prevent any accidental leaks or water flow during the installation.
Steps to Shut Off the Water Supply:
- Locate the shut-off valve: The shut-off valve is typically located beneath the sink. It might be connected to the water line leading to the faucet.
- Turn off the valve: Rotate the valve clockwise until fully closed. This action stops the water flow to the sink and faucet.
- Remove Existing Plumbing Connections
To prepare for installing the under sink water filtration system, removing any existing plumbing connections that might obstruct the installation or interfere with the new system is necessary. Installation involves the methodical setup and arrangement of components to ensure proper functioning.
Steps to Remove Existing Plumbing Connections:
- Disconnect the Cold-Water Supply Line: Locate the cold-water supply line connected to the shut-off valve. Use an adjustable wrench to loosen and disconnect this line carefully.
- Remove Attachments Leading to the Faucet: Check for any attachments or connections leading to the faucet that might interfere with the installation. Unscrew or detach these components carefully.
IV. Installation Steps
A. Choose the Installation Location
The appropriate location for installing the under-sink water filtration system is crucial for accessibility and functionality.
Considerations for Choosing the Installation Location:
- Adequate Space: Ensure sufficient space under the sink to accommodate the filtration system without interfering with other components or hindering access to plumbing.
- Proximity to Water Source: Position the system close to the cold-water supply line for easy connection.
- Mounting Surface: Choose a stable and flat surface that can support the weight of the filtration system.
B. Mount the Filter System Securely
Once you've identified the installation location, securely mounting the filtration system is the next step. An under sink water filter is a compact filtration system installed beneath the sink, providing readily accessible clean water.
Steps to Mount the Filter System:
- Use the mounting hardware provided in the filtration system kit.
- Follow the manufacturer's instructions for mounting the filtration unit securely under the sink.
- Ensure the system is positioned firmly and doesn't obstruct other under-sink components or interfere with plumbing connections.
C. Connect the Water Lines
Connecting the water lines is a critical phase of the installation process. Installation, whether of a water filter or any appliance, demands attention to detail and adherence to specific guidelines.
Steps to Connect the Water Lines:
- Follow the manufacturer's guidelines to connect the cold-water supply line to the inlet of the filtration system. Use the provided connectors or tubing.
- Connect the outlet of the filtration system to the faucet supply line using the appropriate fittings or tubing.
- Check that all connections are securely tightened to prevent leaks. Use Teflon tape or plumber's tape on threaded connections if necessary.
D. Install the Faucet
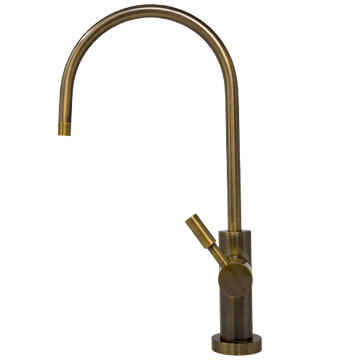
If your under sink water filtration system includes a dedicated faucet, installing it properly is essential for optimal functionality.
Steps to Install the Faucet
- Follow the manufacturer's instructions provided with the dedicated faucet.
- Drill a hole in the sink or countertop if required for faucet installation.
- Install the faucet securely, ensuring a watertight seal.
- Connect the faucet to the filtration system according to instructions.
V. Testing and Final Checks
A. Check for Leaks and Test the Water Flow
After completing the installation, checking for any leaks and ensuring proper water flow through the filtration system is crucial. To enhance water quality, a water filter install is necessary, removing contaminants and impurities from the water source.
Steps to Check for Leaks and Test Water Flow:
- Slowly turn on the water supply using the shut-off valve.
- Carefully inspect all connections, joints, and fittings for any signs of leaks. Use a dry cloth or tissue to check for moisture.
- Test the water flow by turning on the faucet connected to the filtration system. Verify that water flows smoothly without any leaks from the connections.
B. Recheck Connections and Tighten if Needed
Even after the initial check, it's wise to recheck all connections to ensure they are properly secured. To ensure clean drinking water, install a water filtration system designed to remove pollutants and enhance water quality.
Steps to Recheck Connections:
- If leaks are detected during the initial test, shut off the water supply.
- Reexamine all connections and fittings, tightening them as needed using an adjustable wrench or pliers.
- Ensure that connections are snug but not overtightened to prevent damage.
Conclusion:
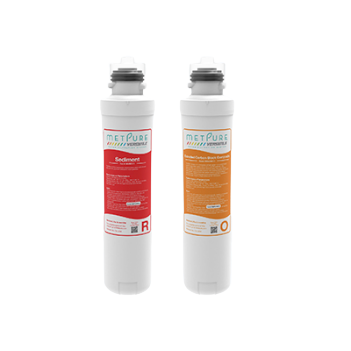
Installing an under-sink water filtration system is a proactive step towards ensuring clean and safe drinking water at home. By meticulously following the installation steps, conducting thorough checks for leaks, and priming the system if needed, you pave the way for a reliable source of purified water. Regular maintenance and timely filter replacements are key to sustaining the system's effectiveness. Emphasizing safety during installation ensures a smooth process. Ultimately, this investment guarantees easy access to high-quality, purified water, fostering a healthier lifestyle and peace of mind for you and your family.


