Introduction
PEX, short for cross-linked polyethylene, is a widely used plastic tubing in plumbing, heating, and cooling setups. It's the top choice for plumbers or homeowners because of its flexibility, toughness, and straightforward installation. However, getting the installation right is crucial to guarantee that PEX tubing functions correctly.
In this article, you’ll find the installation steps to install PEX tubing by making a crimp connection and all the necessary precautions you need to take to ensure PEX serves its purpose effectively.
Check out: 5 Things to Consider When Choosing Pipe Fitting Materials
Precautions Before Installing PEX Tubing
The installation process for PEX tubing is generally straightforward, but it’s important to take certain precautions before you get to work.
- Temperature: PEX tubing comes with temperature ratings. It's crucial to select tubing that suits the temperature requirements of your application and ensure that the operating temperature stays within the specified range.
- Pressure: Similarly, PEX tubing is rated for specific pressure levels. It's essential to choose tubing that matches the pressure needs of your system and ensure that the pressure remains within the prescribed limits.
- UV Exposure: Generally, PEX tubing should be shielded from direct sunlight or UV radiation. If any section of the tubing will be exposed to sunlight, it's necessary to either use UV-resistant materials or protect the tubing with insulation or coverings.
- Chemical Exposure: While PEX tubing is resistant to some chemicals, it can be affected by others. Before exposing PEX tubing to any chemicals, you should consult the manufacturer's recommendations to avoid potential damage or degradation.
Keeping all of this in mind, you’re now ready to move forward to the next step.
Read: Types of PEX Fittings - A Complete Guide of All PEX Fittings
General Guide For Installing PEX Tubing
Before you move on to installation, you need to keep these essential steps in mind:
- Preparation: Gather all necessary tools and materials, including PEX tubing, fittings, clamps, and the appropriate connection tool, whether it's a crimping tool or another method.
- Marking: Identify and mark the locations where the PEX tubing will be installed. Use a marker or pencil to indicate the length of tubing needed and the placement of fittings.
- Cutting: Utilize a PEX tubing cutter to cut the tubing to the required length. Ensure the cuts are made straight to avoid jagged edges.
- Connection: Connect the PEX tubing to the existing plumbing or heating system, ensuring a secure connection. Utilize clamps or other securing devices as necessary.
- Testing: Once the installation is complete, conduct a thorough test of the system to check for leaks and ensure proper functionality. This step is crucial before turning on the water or heat to avoid any potential issues.
By following these key steps, you can ensure a successful installation of PEX tubing in your plumbing or heating system, regardless of the connection method chosen.
Required Tools For the Crimp Connection
Materials:
Tools:
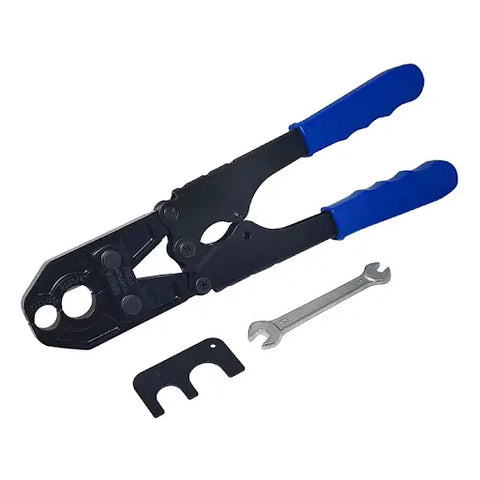
- PEX crimp tool
- PEX cutter
- Optional: PEX decrimping tool
After you’ve acquired the material and tools, it’s time for installation.
Steps to Install PEX Tubing by Making A Crimp Connection
Here's a step-by-step guide to making a PEX connection using the crimp method:
- Cut the PEX tubing: Firstly, you need to use a PEX cutter positioned at a 90-degree angle to ensure a smooth and even cut.
- Slide the PEX crimp ring: Then, place the PEX crimp ring over the tubing, sliding it approximately 2 inches past the end.
- Insert the PEX fitting: After inserting the crimp ring, fully insert the PEX fitting into the PEX tubing so that the fitting's shoulder makes contact with the tubing.
- Position the crimp ring: Move the PEX crimp ring to a position about 1/4 to 1/8 inch from the end of the tubing. This ensures the crimp ring sits directly above the barbs on the PEX fitting.
- Prepare the crimp tool: Open the jaws of the PEX crimp tool.
- Position the crimp tool: Place the PEX crimp tool over the crimp ring, ensuring it is positioned evenly and at a 90-degree angle to the tubing. Make sure the jaws of the tool are centered over the crimp ring and remain in place.
- Close the crimp tool: Completely close the jaws of the crimp tool to create a secure connection.
- Check the connection: Use a go-no-go gauge to verify the connection. The gauge should fit properly over the crimped ring, indicating a successful connection.
- Inspect the connection: Ensure the crimp ring is properly secured and the connection is leak-free. If the connection is not satisfactory, remove the crimp ring, recalibrate the tool, and redo the connection.
Following these steps ensures a reliable and properly crimped PEX connection, but if your connection is faulty, you can use a decrimper tool to remove the crimp ring and make the connection again.
Check out: Premium Brass Fittings: A Comprehensive Guide for Durability
How To Remove A Crimp Ring
Here's a detailed guide on how to remove a crimp ring using a decrimper tool if a connection doesn't gauge properly or if it was done incorrectly:
Step 1: Using a PEX cutter, carefully remove the section of PEX tubing containing the fitting. Aim to cut as close to the end of the fitting as possible without causing any scratches or damage.
Step 2: Open the jaws of the decrimping tool in preparation for use.
Step 3: Visually examine the PEX decrimping tool. It consists of two jaws: one for cutting the ring (the sharp one) and one for supporting the PEX fitting from the inside (the dull one).
Step 4: Insert the decrimping tool into the cut-off section of the PEX tubing.
Step 5: Completely close the jaws of the decrimper tool. This action will split the crimp ring.
Step 6: Rotate the piece 180 degrees and repeat Step 4. This will fully split the PEX crimp ring in half, facilitating its removal by hand.
Step 7: With the crimp ring removed, the remaining section of PEX tubing can be easily detached, leaving the PEX fitting undamaged and reusable for future connections.
Following these steps ensures the proper removal of a crimp ring using a decrimper tool, preserving the integrity of the PEX fitting for subsequent use.
Now, you can follow the steps for installation again as described above to make a successful crimp connection.
Check out: DIY Plumbing: A Complete Guide to fixing common pipes issues