Replacing a kitchen faucet is one of the simpler DIY projects that many homeowners can complete in one afternoon, yet it is crucial that all necessary steps be taken for an effortless installation and to avoid complications during installation. To guarantee successful outcomes and minimize potential hassle, follow this checklist.
Before beginning, turn off the water supply by closing any associated valves under the sink, clear the area under it, and gather your tools and materials.
Turn Off the Water
Installing a kitchen faucet may be one of the easier DIY plumbing projects, but mistakes could still cause costly water damage. Before beginning your installation project, it is crucial that you turn off your water source - best done through turning off any under-sink valves, but in their absence switch off all main water lines directly.
To avoid any mishaps, ensure you have a clean workspace by temporarily moving any items under the sink. Next, shut off the water supplies to the faucet by finding and turning clockwise the valves underneath your sink. Finally, disconnect your old faucet by detaching its water lines and detaching its side sprayer hose from its spout.
Disconnect the Water Supply Lines
Your kitchen faucet gets used every day, making it inevitable that it may begin showing signs of wear over time. These could include low water pressure, malfunctioning valves or leaks.
If these problems arise, replacing the kitchen faucet may be necessary. Luckily, this project can usually be finished within an hour or less.
First, shut off all water supply lines to the old faucet by turning its shut-off valves clockwise. Next, clear away everything from beneath your sink into a bucket before using pliers to loosen its locking nuts on its base. Lastly, reconnect all hoses by pointing them towards a bucket to drain any remaining liquid from them.
Unscrew the Faucet
Assuming you don't have super long arms or assistance available to you, a bucket should be placed beneath the sink to collect any water that might spill as you disassemble an old faucet. Working from above, remove the handle(s), spout, and any hidden set screws found under an escutcheon ring that could potentially cover this set screw on its underside.
Once the handle or spout has been detached, it's time to dismantle the faucet itself. Locate its mounting nut under the sink, and use a wrench to loosen it. If any stubborn nuts remain attached, try applying penetrating oil before waiting at least half an hour (or overnight in severe cases).
Once the nut has been dislodged, pull out and unmount the entire faucet assembly from its perch in the sink.
Remove the Faucet
An updated faucet can add style and function to your kitchen, but installing one may prove challenging if its original installation was subpar or the sink damaged. For best results, we advise seeking professional assistance for such work when dealing with water lines; always ask to see their portfolio or reviews first!
First, disconnect the old faucet's water supply lines using a basin wrench and penetrating oil (if needed). Next, unscrew its locking nut before disconnecting any two-handle models with side sprayers that include their respective hose guides if applicable. With that done, start installing your new one - once everything has been taken apart it should go much more quickly!
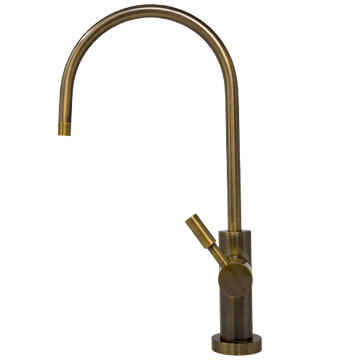
Install the New Faucet
If your new faucet arrives, read through and follow its manufacturer's instructions for installation. Depending on its model, this could involve threading water lines through shut-off valves into your sink before connecting them to its faucet.
Turn the water back on and run it for one more minute to flush any remaining dirt or debris from your lines. If you have a sprayer/aerator, unscrew it and spray a full blast of water through its holes to help clean them as well.
Once finished, clean out everything underneath your sink and vacuum the area before installing your new kitchen faucet! Enjoy your beautiful new kitchen! And if any assistance with plumbing is required, feel free to reach out. We are more than happy to assist.